Editing the Menu System
In this topic:
Procedure
Select menu . This will open the following dialog box
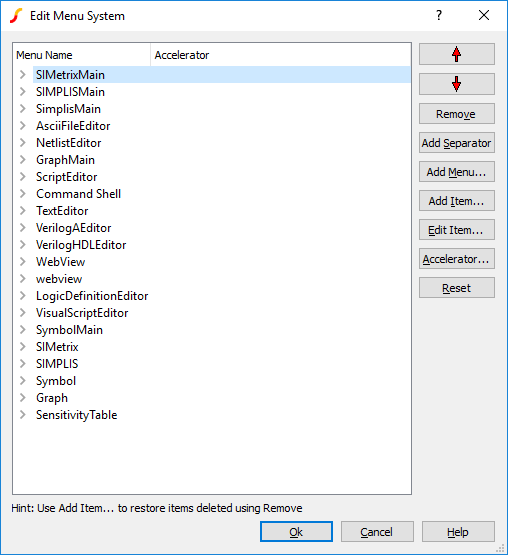
The above view shows the layout for SIMetrix/SIMPLIS products. For SIMetrix only products the top level menu choices will be slightly different.
The left hand pane shows the current menu system in a tree structured list. The buttons on the right allow you to move, delete or add new menu items and sub menus.
To Delete a Menu Item or Entire Sub-menu
Select the item you wish to delete on the left hand side then press Remove. To subsequently restore a deleted item, use Add Item... (see below).
To Move a Menu Item or Sub-menu
Select the item then use the up and down arrows key to move as required. If you wish to move a menu item to a different sub-menu, you should remove it (as described above) then add it again using Add Item... (see below).
To Add a New Menu Item
You can add a previously removed menu item to a new location or you can create a completely new menu item.
In both cases, select the location within a sub-menu and press Add Item.... To add a previously removed menu select Add Existing and choose an item in the left hand pane. This pane will be empty if you have not previously removed any menu items. (This could be in a previous session as deleted items are always remembered).
To add a new item press Add New then enter the required values. For Name enter the name of the menu as you would like to see it in the menu itself. Use the '&' character to denote underlined letters used to denote alt-key short-cuts. E.g. &My Menu will be displayed My Menu and will be activated with alt-M. For Command String you must enter a valid SIMetrix command. Typically this would call a user defined script, but you may also enter primitive commands or a list of primitive commands separated by semi-colons. See the Script Reference Manual/Command Reference for full details.
To add a separator to the sub-menu, press Add Separator.
To Create a New Sub-menu
Select the location for your new menu then press Add Menu.... Enter the menu name as required. The new sub-menu will have one single empty item which you can select to add new items to the sub-menu. The empty item will not appear in SIMetrix menus.
To Edit or Add an Accelerator Key
Select the menu item to which you wish to assign the accelerator key. Press Accelerator.... You will now be asked to press a single key or key combination with shift, control or alt. The key you press will be assigned to the menu.
Press Remove to delete the accelerator key assignment.
To Reset to 'Factory' Settings
Press Reset to reset the menu system back to 'factory settings'. Usually this means that the menu system will revert to the structure defined when SIMetrix was first installed. However, if you defined any menus in the startup script using the DefMenu command, these menus will be faithfully restored as well.
'Reopen' Menu
The Reopen menu in the File menu is dynamically updated to include schematic files recently opened or saved. The items in this menu are not listed in the Menu Editor and cannot be edited. The Reopen sub-menu itself should not be deleted, or moved to a new sub-menu nor should it be renamed, but it may be repositioned in the File menu as desired.
| ◄ Command Line | User Defined Toolbars and Buttons ▶ |